The Waivers tab within a reservation allows you to search for a signed waiver and attach it to the reservation if you are integrated with Smart Waiver or using Flybook Waivers.
To view the Waivers tab within a reservation:
1. Go to the Dashboard and search for the reservation

2. Once in the reservation, click on the Waivers tab

3. If your client has already completed a waiver from the unique waiver link in their confirmation email, they will show on this page under the list of signed waivers. If they completed a waiver from a generic waiver link (ex. a waiver kiosk station at your location) or from a previous reservation, and you want to assign that waiver into the reservation you can search for the client's name to find their waiver. To do this, start typing the client's name (first or last) or email address and then select the waiver you'd like to add to the reservation from the drop-down.
4. Once you've added the waiver to the reservation, you'll see it listed under the signed waivers section. 
5. From this tab, you can also send the custom waiver link for this reservation to a client's email or cell phone (via text). To do this, type the client's email address or cell phone number in the highlighted box and then click the corresponding Send button below. 
6. If you're using the Tickets feature of Flybook and you want to assign waivers to specific tickets, you'll see a Tickets dropdown in the signed waivers section as well. From here you can select which ticket you want to assign to that waiver. 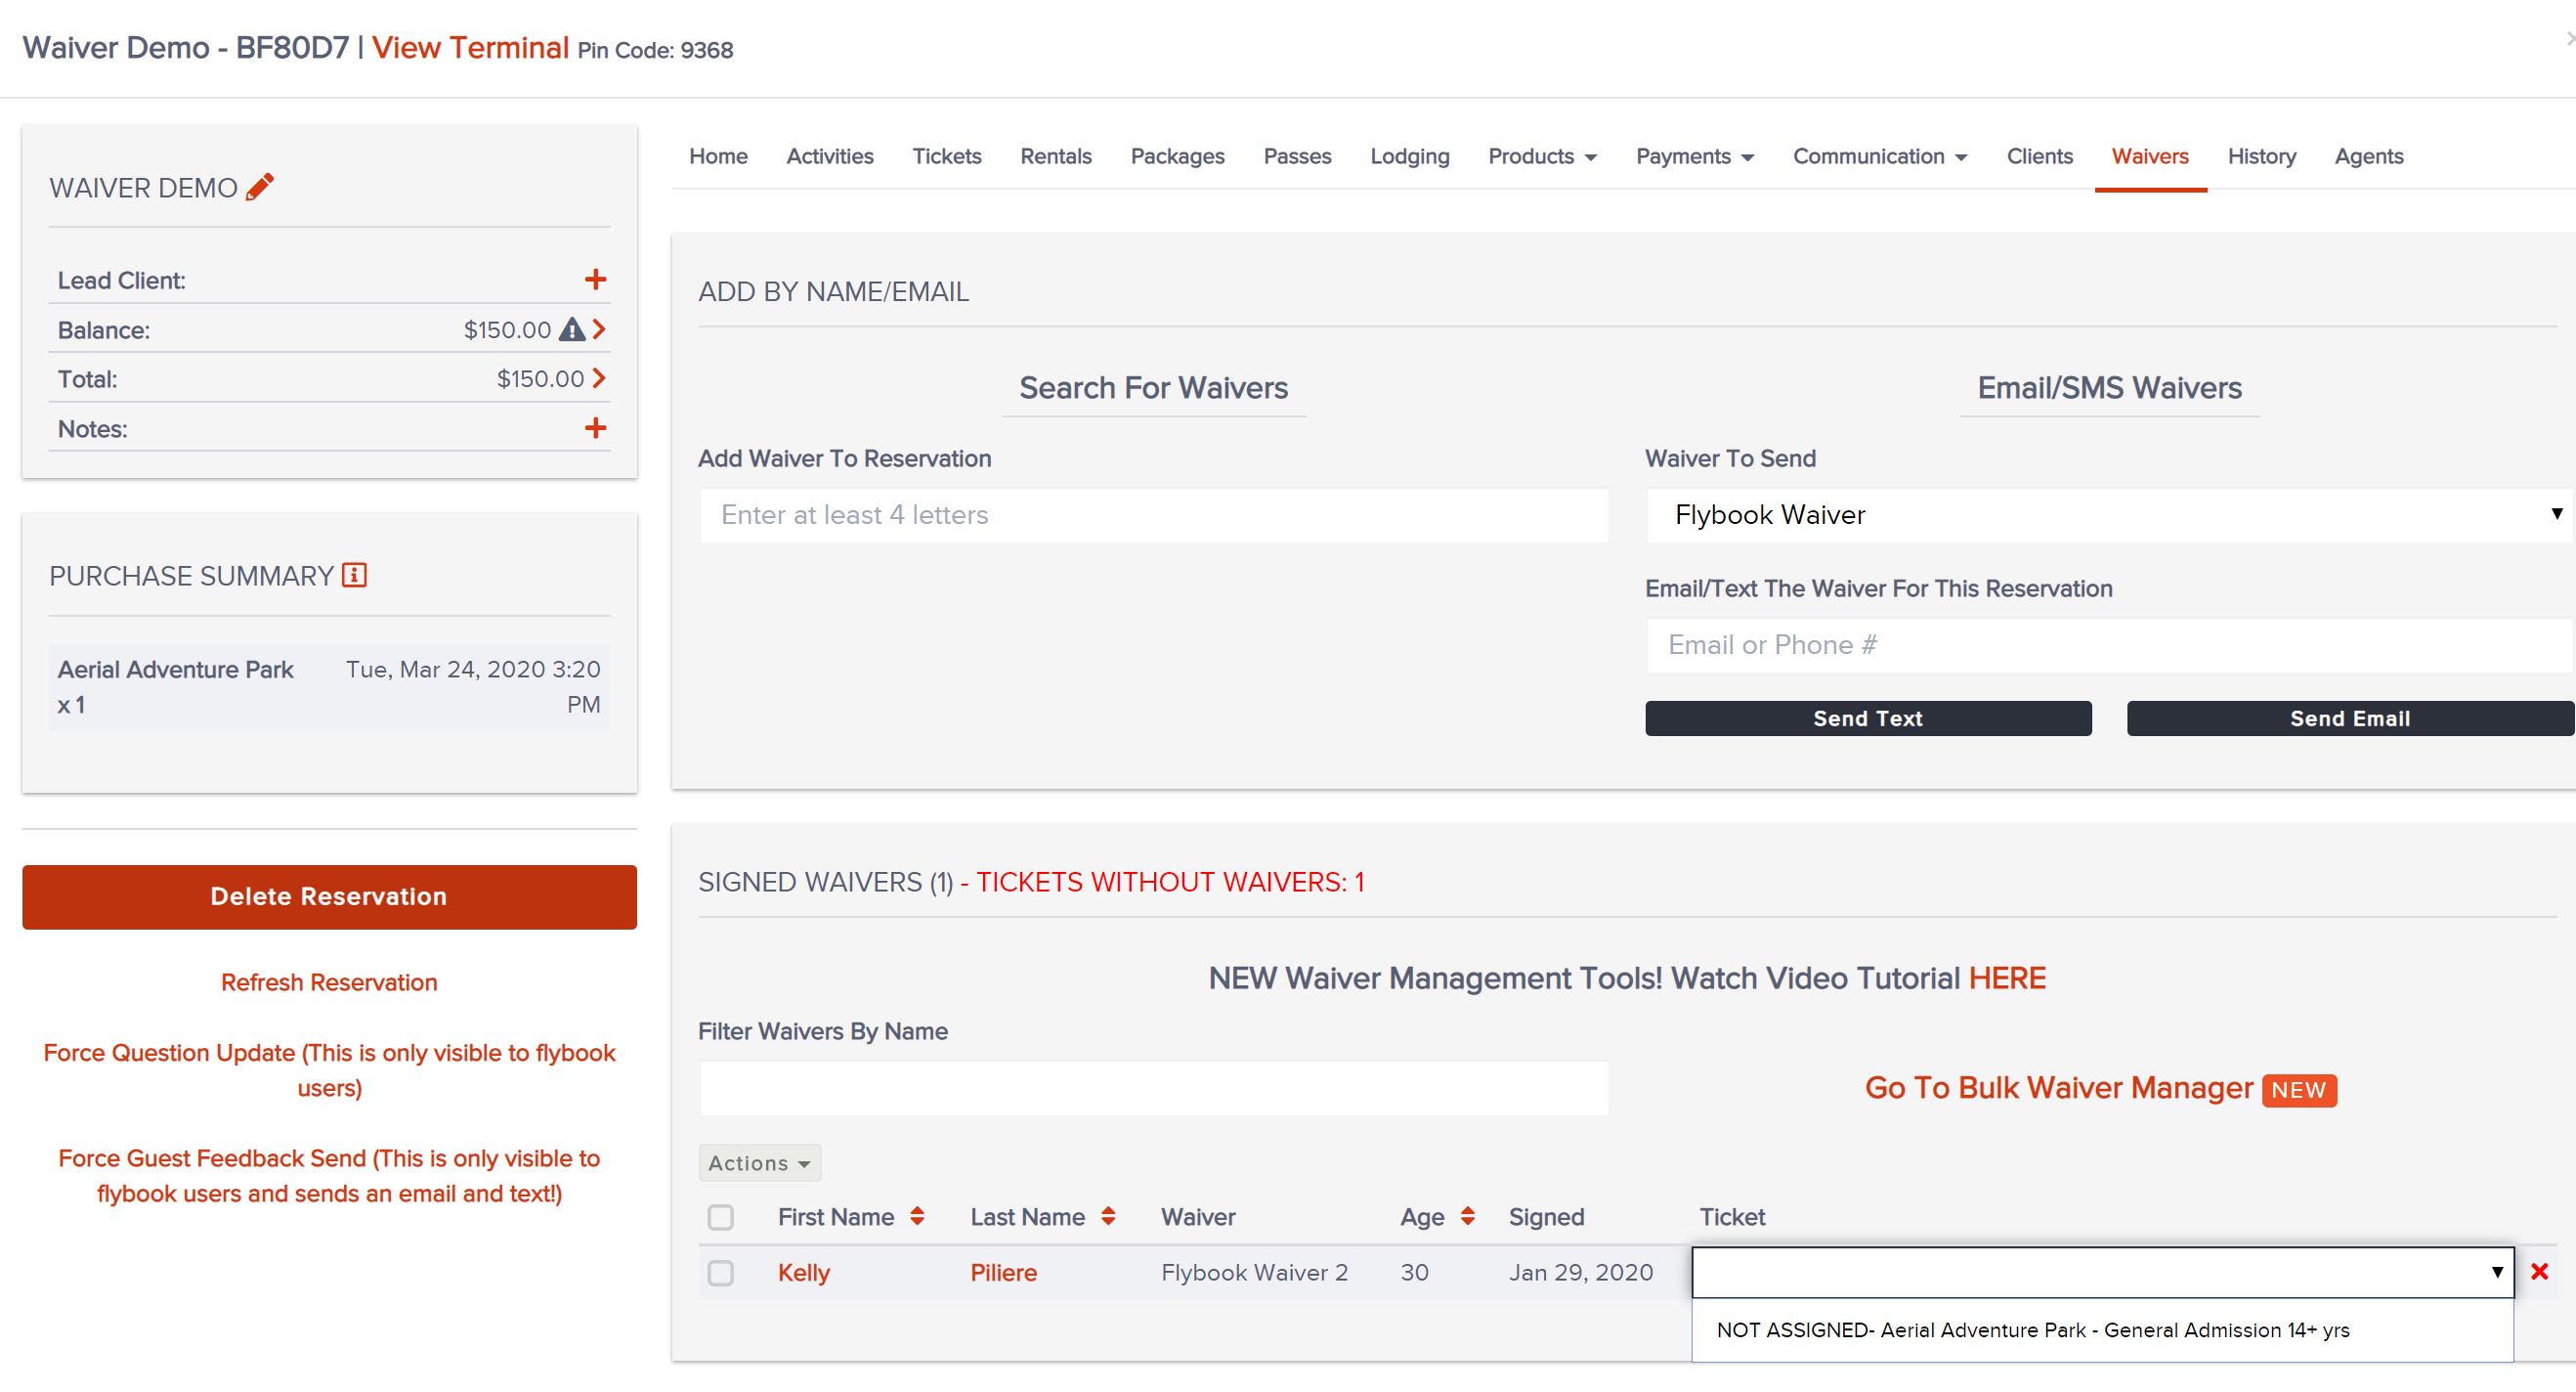
7. If you have many tickets on the reservation, you may want to use the Bulk Waiver Manager. Below is a video tutorial that discusses that feature.