What does the memberships feature do?
The memberships feature, available to accounts using Fullsteam/Flybook Pay as their credit card processor, allows you to sell your clients a monthly or annual membership which will allow the client to participate in an unlimited number of reservations for the items you set up the membership for as long as their membership is valid. Memberships can be set up to auto-renew and auto-charge the client's credit card on a monthly or annual basis.
Setting up memberships
- Go to Setup --> Memberships --> Subscriptions

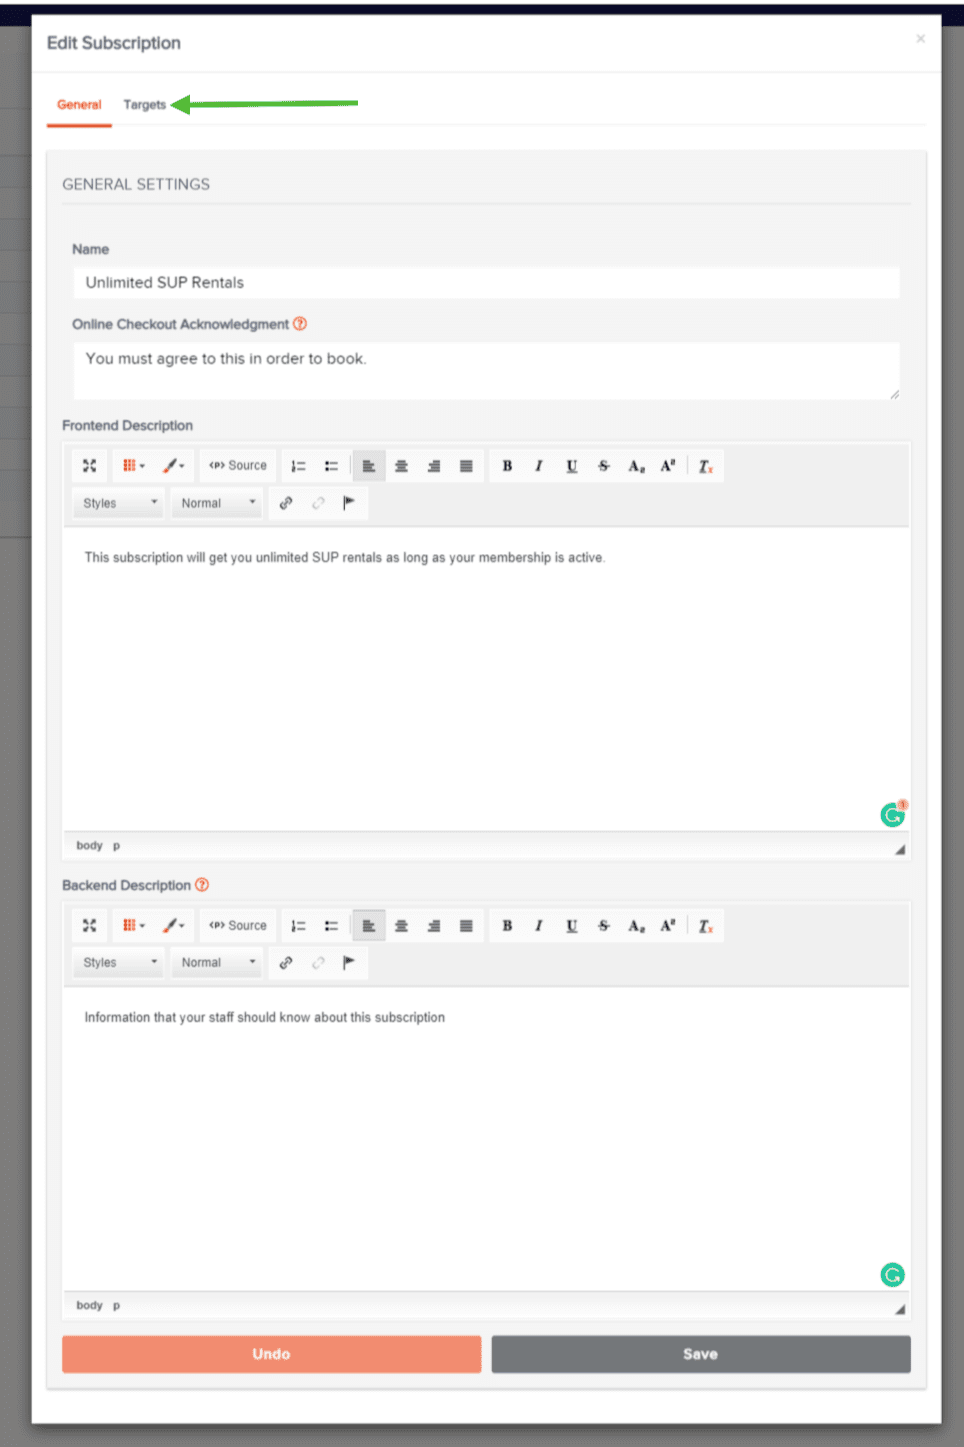
- Click Add New, name the subscription, and click Create. *Note: you can include multiple different subscriptions in one membership.


- Add an Online Checkout Acknowledgment. This is a message your clients will be presented with and must agree to when they are booking online and apply their membership code. This is a required field in order to sell online.

- If you'd like to describe to your clients what's included in this subscription during the online checkout process when purchasing a membership, add a Front End Description. If you don't plan to sell your memberships online or don't want to include a front-end description for this subscription, continue to step 5.

- If you'd like to include a backend description of the subscription, add that in now. This can be used to convey information about how to honor/use the membership for your staff. If you don't want to include a backend description for this subscription, continue to step 6.

- Click Save

- Click Targets
- Click Add Another Target
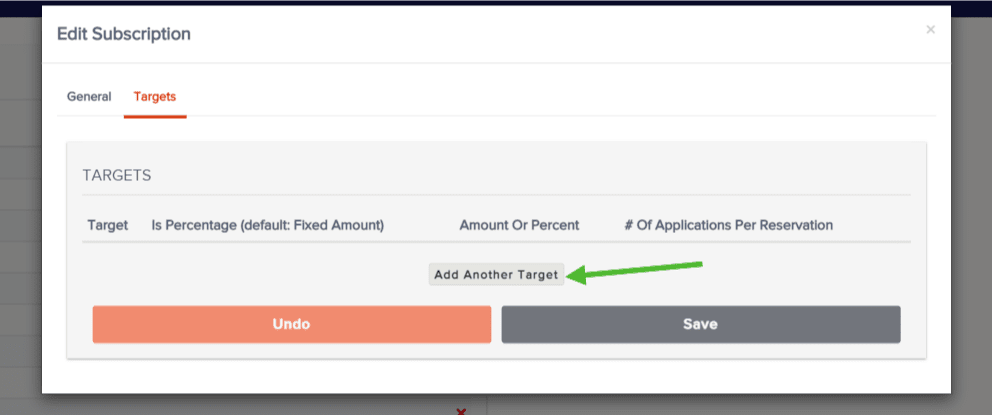
- Select the Activity, Rental, Pass, Ticket, Package, Room, or Lodge that this subscription is good for from the Target dropdown.

- Select if once this membership is applied if it should take a percentage or fixed amount off the invoice cost of that target. Select if the membership applies to fees (this only applies to flat fees, not percentage fees, as a percentage fee will automatically be affected since the invoice cost of the target is being affected). Enter the percentage or fixed amount the discount is for.
*Note: The membership will apply to all pricing options for tickets and activities targets and will apply to all durations of a rental target.

- Set how many times per reservation the membership can apply the set discount. In my example, I'm going to allow the member to get one SUP rental fully covered by their membership per reservation and up to two SUP rentals for friends at a 10% discount per reservation which we'll set up in step 12.

- If you want to add additional targets to this subscription, click Add Another Target and repeat steps 9-11. If you don't want to add any additional targets, skip to step 13.

- Click Save and then click the little gray x to close the window.


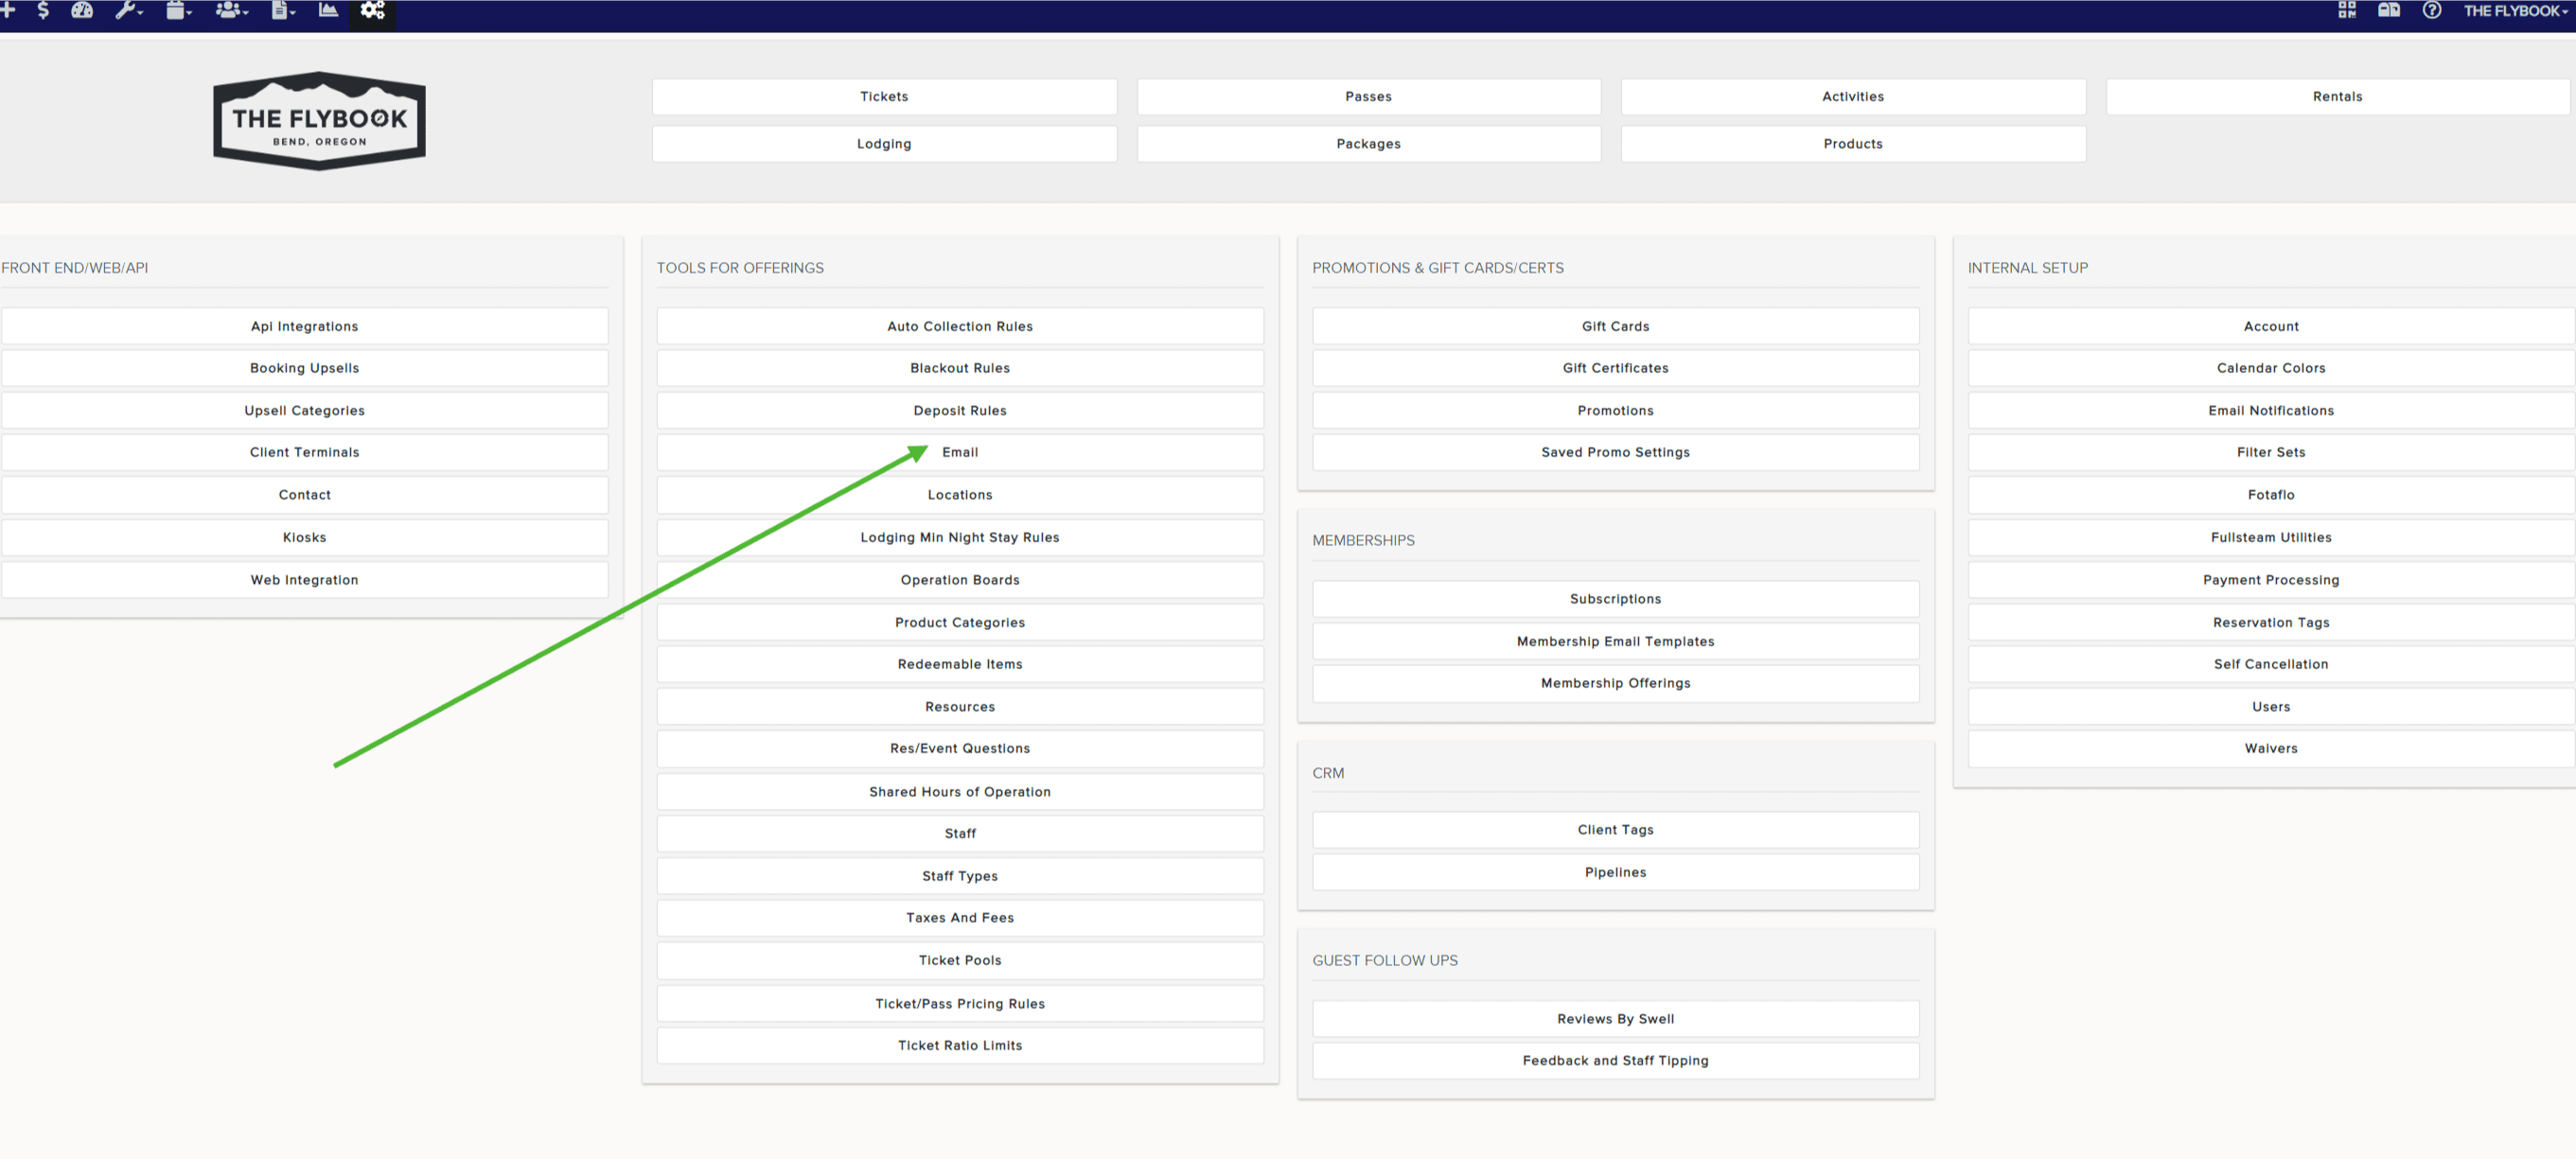
- Go back to Setup --> Tools for Offerings --> Email --> Templates

- Click Add New and name what will be your membership confirmation/welcome email and click Add Template


- In the body of the email template add your welcome message to your members. Some helpful things you might want to include in your email are:
- To include a list of member subscriptions with their front-end descriptions include{{MemberBenefits}}in your email template.
- The member benefits html that is inserted into the template can be styled by using the html class namesmemberBenefits,memberBenefitsNameandmemberBenefitDescriptionfor the inserted code snippet, the title of the subscription, and the description of the subscription respectively.
- To include an image of the membership card include{{MemberCard}}in your selected email template. *Note: the image of the membership card is dynamic, meaning if you add the member's picture to it later, and then the member opens their welcome email again, they'll see their member card with their image. - Once you've completed your membership email template, click Save

- Go back to Setup --> Memberships --> Membership Email Templates

- Click Add New and name your template, give your email a subject line and select the template you created in step 18 from the Email Template dropdown. Then click Create New Membership.

- Go back to Setup --> Memberships Membership Offerings

- Click Add New and name the membership and click Create


- Select the membership offering that you created in step 21 from your list of membership offerings

- Enter the price of your membership, select if you want the membership to auto-renew/auto-collect, select if that auto-renewal/auto-collection is monthly or annually, and select your membership welcome email template that you created in step 19.

- Click Add New to add the subscription you created in steps 1-13 and add any additional subscriptions you want to be included in this membership. Ex: You might have one membership that includes unlimited SUP rentals (with only an unlimited SUP rentals subscription), another membership that includes unlimited kayak rentals (with only an unlimited kayak rental subscription), and then a third membership that includes unlimited SUP rentals and unlimited kayak rentals (that has both the unlimited SUP rental subscription and the unlimited kayak rental subscription).


- If planning to sell this membership online, complete the Front End Settings. If not planning on selling this membership online, skip to step 27.
Check the box that says "Include Membership Offering In Full List" if you want to include this membership in your front end list of all available memberships. If you don't have this selected, you can still sell this membership online but you'd need to provide clients with the direct link to this membership offering.
Check the box that says "Also Show Summary of Subscriptions" if you want the front end to display the front-end description you created in step 4 to be displayed when someone is buying the membership online.
- If selling this membership online, enter the description of the membership you want clients to see when purchasing their membership as well as the terms and conditions for this membership. You can leave the terms and conditions blank if there are no terms and conditions for this membership.

- Click Save

- Your membership is now set up. If you want to sell the membership online, you can now get the URL for the full list of all your memberships or the URL to a specific membership.
If you want the URL to a specific membership, select that membership from the "Specific Offering URL" dropdown.
*Note: Memberships cannot be included in your standard front-end offerings and there's no embed code option for memberships.